I used:
- some 9v batteries
- two croc leads
- a non-conductive pot
- a small strip of aluminium foil
- baking soda
- distilled water
- titanium piercing barbells
- nitrile gloves
- alcohol wipe
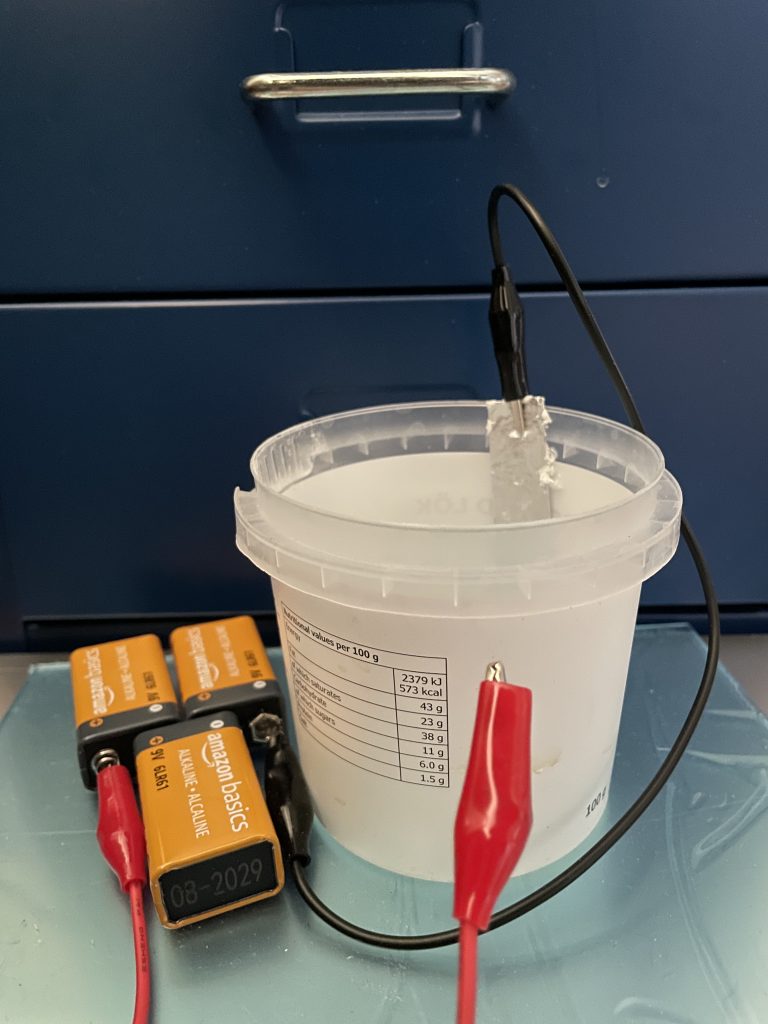
Setup:
- pour distilled water into the container, enough so you can dip the titanium piece in without it touching the bottom of the container
- mix some baking soda into the water until it dissolves (eyeball the quantity)
- connect the negative lead to the small strip of foil and clip it to the container so the bottom of the strip is dipped into the solution (this is the cathode)
- put on nitrile gloves to avoid getting skin oils on the titanium
- clean the titanium thoroughly with the alcohol wipe (no oils = better colour)
- connect the positive lead to the end of the titanium object (this is the anode)
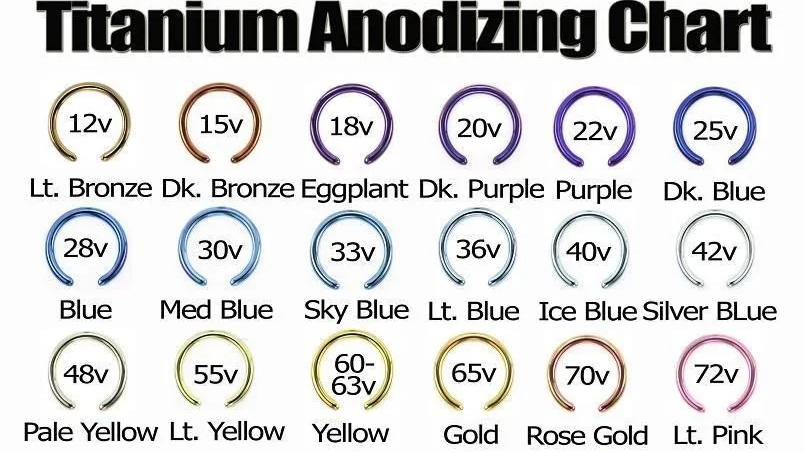
- find the colour you desire on a titanium anodising chart and figure out how many batteries you need to match the corresponding voltage
- connect the number of 9v batteries you want together in series
- connect the leads to their corresponding end of the chain
Be careful: DO NOT LET THE TITANIUM ANODE TOUCH THE FOIL CATHODE
Process:
Dip most of the titanium object into the solution. Think of dipping Achilles into the River Styx by his heel. You want to avoid letting the stainless steel croc clip touch the solution, because it will fizz and the anodisation will stop. The titanium that is submerged will begin to change colour instantly. Once the colour has stopped changing, you can attach the clip to the other end of the object and dip the bare uncoloured bit.
If you don’t like the result, you can use a HIGHER voltage to change the colour, but you cannot revert to a LOWER voltage colour. Start with a small number of batteries.
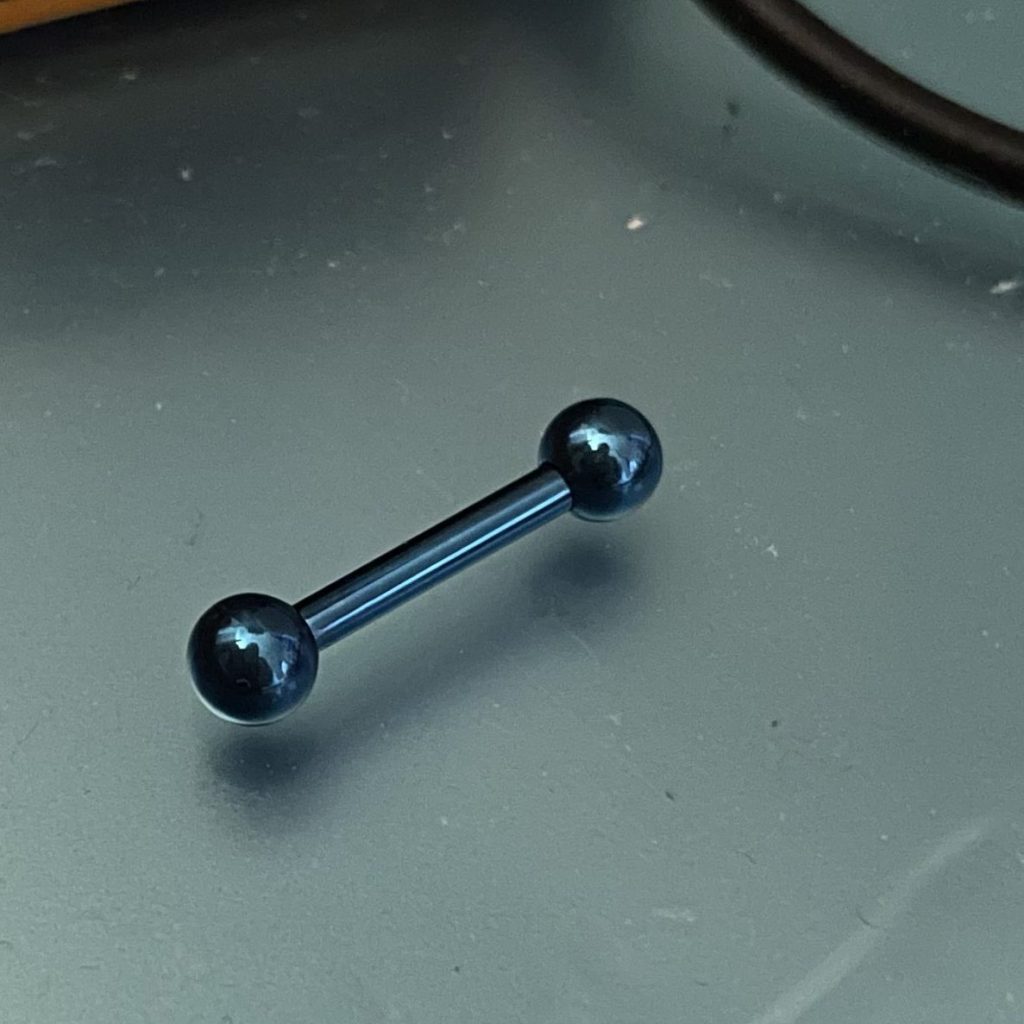
Using 3 batteries gives this nice blue colour. It looks slightly more vibrant in real life.